

Introduction
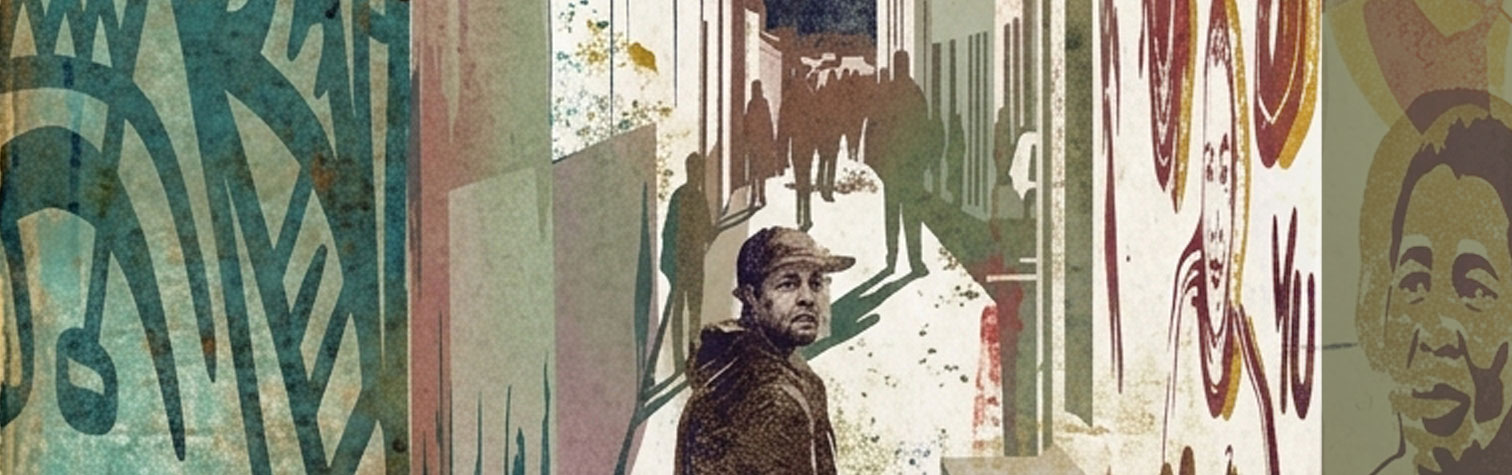
Gelli plate printing is a versatile form of monoprinting that allows artists to create richly textured, layered images without a traditional printing press. Using a flexible gel surface, acrylic paint, paper, stencils, natural materials and found objects, artists can produce unique prints that range from delicate botanical impressions to bold abstract compositions.
The technique encourages experimentation, spontaneity and creative problem-solving. Each print is unpredictable, and even unsuccessful prints can become valuable starting points for further development.
In mixed-media practice, gelli prints can serve as finished artworks or as the foundation for collage, drawing, painting, image transfers and assemblage. By combining transparent and opaque colours, repeated impressions and contrasting textures, artists can develop complex surfaces with considerable visual depth.
Learning objectives
By the end of this lesson, students should be able to:
- Understand the basic principles and materials of gelli plate printing.
- Create prints using stencils, leaves, flowers, textured materials and laser-printed images.
- Build multiple layers using transparent and opaque acrylic colours.
- Use the art principle of Emphasis to establish a focal point.
- Produce a collection of original prints suitable for further mixed-media development.
Art Principle: Emphasis
Emphasis is the principle of art used to create a focal point — the area of an artwork that attracts the viewer’s attention first.
An artist can establish emphasis through contrast, colour, size, detail, isolation, texture or the strategic placement of an object. In gelli plate printing, emphasis can emerge from the interaction between printed layers, positive and negative shapes, and areas of visual complexity and simplicity.
Ways to create emphasis in gelli prints
- Colour contrast: Place a bright red shape against a muted green or neutral background.
- Value contrast: Use a dark silhouette against a pale field.
- Scale: Introduce one large leaf or geometric shape among smaller repeated forms.
- Isolation: Leave an area relatively quiet around the focal point.
- Texture: Contrast a finely detailed botanical impression with a smooth, uninterrupted area.
- Layering: Allow a final opaque shape to stand out against several transparent layers.
Practical example: Create a background using several translucent layers of blue and green. Print a large leaf silhouette in a contrasting opaque colour, then introduce a few smaller marks. The dominant leaf becomes the focal point because of its colour, scale and contrast.
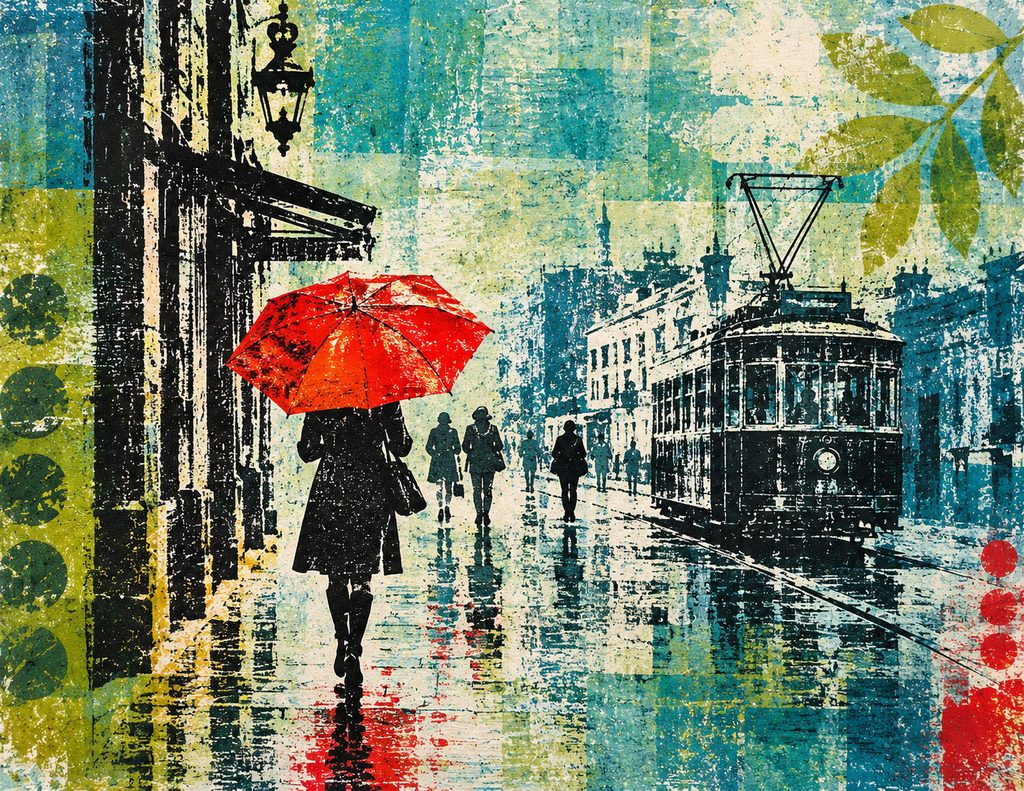
Remember that emphasis does not require every part of the artwork to be dramatic. A focal point becomes stronger when the surrounding areas support rather than compete with it.
What is a gelli plate?
A gelli plate is a soft, flexible, reusable printing surface designed for making monotypes and monoprints. Commercial plates are usually made from a durable synthetic gel-like material. Homemade alternatives can be made using gelatine, glycerine and water.
The plate is coated with a thin layer of acrylic paint using a rubber roller, known as a brayer. Objects can then be placed on the painted surface to create patterns, masks, textures and impressions. Paper is pressed onto the plate to transfer the paint.
Because the paint is applied by hand, every print has its own characteristics.
Important terminology
- Monotype: A unique print made from a painted or inked surface, with little or no repeatable image.
- Monoprint: A print that may use a repeatable element, such as a stencil or matrix, but includes unique variations in the finished impression.
- Positive shape: The printed object or form itself.
- Negative shape: The surrounding area or the space left unprinted.
- Ghost print: A second impression made from residual paint remaining on the plate after the first print.
A ghost print is often lighter and more delicate than the original. It can be used as a subtle background for subsequent layers.
Recipe: Making a homemade gelatine printing plate (Approx 23 cm by 18 cm by 2cm thick)
A homemade plate is an economical way to explore gel printing. It is more delicate and less durable than a commercial synthetic plate, but it works well for introductory experiments.
Ingredients
- 115 g unflavoured powdered gelatine.
- 125 ml cold water.
- 375 ml glycerine.
- 375 ml boiling water.
Equipment
- A microwave proof mixing bowl.
- Measuring jug and spatula.
- Fine sieve.
- A container, smooth-bottomed approximately 23 X 18 cm.
- A level work surface.
- Glass or clear perspex sheet to support your gelli plate.
Method
- Check that the tray is level. Any unevenness will affect the thickness of the plate.
- Mix the cold water and approximately half the glycerine in the bowl.
- Sprinkle the gelatine gradually into the mixture, stirring gently to prevent lumps.
- Allow the gelatine to absorb the liquid for 20 minutes.
- Add the boiling water and stir slowly until the gelatine dissolves.
- Use the microwave in 30 second intervals until the gelatine fully disolved.
- Add the remaining glycerine and mix gently. Avoid creating excessive air bubbles.
- Strain the mixture through a fine sieve into the prepared container.
- Skim off surface bubbles and leave the container undisturbed on a level surface.
- Allow the mixture to cool, then refrigerate until completely firm, about 2 hours.
- Carefully loosen the edges before removing the plate, if necessary. Place the Gelli plate on a sheet of glass or perspex before printing.
Safety and storage
Homemade gelatine plates are perishable. Store them in a clean, airtight container in the refrigerator. Inspect regularly for mould, unpleasant odours or deterioration, and discard the plate if any develops. Do not assume that adding glycerine makes a homemade plate permanently shelf-stable.
Contemporary artists working with gelli plates
Study the work of these artists to understand different approaches to colour, texture, layering and composition.
1. Birgit Koopsen — Colourful mixed-media abstraction
Koopsen is a Dutch printmaker and mixed-media artist known for vibrant colours, layered printed papers, stencils, mark-making and experimental compositions. Her work demonstrates how repeated printing, shapes and gestural marks can be combined into energetic abstract surfaces.
Study: How does she build up colour and texture without allowing every layer to compete equally for attention?
Website: https://www.birgitkoopsen.com/
2. Kim Herringe — Botanical gel plate monoprints
Australian artist and educator Kim Herringe explores botanical forms, translucent colour and the delicate detail of leaves and other natural materials. Her work demonstrates how subtle layers and organic shapes can create complex images while retaining a sense of simplicity.
Study: How do overlapping transparent colours and botanical silhouettes create depth and atmosphere?
Website: https://kimherringe.com.au/
3. Hermien van der Merwe — Botanical monoprinting
South African artist Hermien van der Merwe uses monoprinting, including homemade gelatine plates, to explore plants and natural forms. Her practice demonstrates how local botanical material can become the basis for expressive prints, sometimes incorporating text and additional visual elements.
Study: How can the shapes and textures of indigenous plants inspire a personal visual language?
Website: https://www.hermien-art.co.za/
These artists offer three useful directions for experimentation: abstract colour and pattern, subtle botanical layering, and a personal interpretation of the natural environment.
6. Materials required
- Gelli plate, commercial or homemade.
- Soft rubber brayer.
- Acrylic paints in a selection of colours.
- Acrylic glazing medium or suitable slow-drying medium.
- Smooth and textured papers, including 300 gsm mixed-media paper.
- Laser-printed black-and-white images.
- Stencils, including handmade stencils.
- Fresh flowers and leaves.
- Scrunched-up paper, tissue paper, bubble wrap and textured fabrics.
- Cardboard, string, mesh and other found objects.
- Masking tape, scrap paper and paper towels.
- Water container and cleaning cloth.
- Sketchbook or journal for recording experiments.
7. Step-by-step: How to use a gelli plate
Step 1: Prepare your workspace
Place the plate on a stable, level surface. Have your paper, paint, brayer, stencils and texture materials ready before beginning. Acrylic paint dries quickly, so an organised workspace makes the process easier.
Step 2: Apply the first colour
Place a small amount of acrylic paint on the plate. Roll it out with the brayer until it forms a thin, even film.
Too much paint can create muddy impressions, obscure fine details and prevent clean transfers.
Step 3: Create texture
While the paint is wet, experiment with one or more of the following:
- Press a stencil into the paint.
- Place leaves or flowers onto the plate.
- Make marks with a cotton bud, blunt tool or the edge of a piece of cardboard.
- Press scrunched-up paper or bubble wrap into the paint.
- Lift paint away using scrap paper or a clean tool.
Step 4: Place your paper
Lay your paper carefully over the plate. Smooth it gently with your hands, applying even pressure across the surface.
Avoid shifting the paper, as this can cause blurred edges.
Step 5: Pull the print
Peel the paper away slowly, starting at one edge. Examine the impression and identify areas that could be developed further.
Step 6: Make a ghost print
Without cleaning the plate completely, place another sheet of paper onto the remaining paint. Press gently and lift.
The result will usually be lighter, with subtler textures and marks.
Step 7: Build another layer
Allow the print to dry before introducing another colour or image. Repeat the process using different stencils, natural materials or textures.
Step 8: Develop the composition
Continue until the print has sufficient depth and visual interest. Introduce a strong focal point, preserve some quieter areas and avoid covering every part of the image.
Step 9: Evaluate and refine
Consider whether the print works as a finished image or whether it would benefit from drawing, collage, ink, pastel or further painting.
The importance of layering
Layering is one of the most important aspects of gelli plate printing. Each new impression interacts with the marks, colours and textures beneath it. Successful layering depends on understanding transparency, opacity, drying time and visual hierarchy.
A. Transparent colours
Transparent colours allow underlying layers to remain visible. When placed over another colour, they create optical mixtures and a sense of depth.
Use transparent acrylic colours or acrylic glazing medium to create translucent layers.
For example, a transparent blue printed over yellow can produce a greenish effect where the two layers overlap.
Transparent layers are particularly useful for atmospheric backgrounds, subtle colour shifts and maintaining the visibility of earlier marks.
B. Opaque colours
Opaque colours conceal much of what lies beneath them. They can create bold shapes, strong contrast and a clear focal point.
Use opaque colours selectively to reinforce the composition or introduce a dominant shape.
For example, a solid dark leaf silhouette printed over a pale, layered background can immediately establish emphasis.
C. Understanding drying time
Acrylic paint dries through the evaporation of water and the formation of a paint film. The drying time depends on the paint’s thickness, the room temperature, humidity and the medium used.
- Wet paint: Can be manipulated, lifted, scraped or textured.
- Tacky paint: May transfer unevenly or stick to the plate and paper.
- Dry paint: Provides a more stable foundation for subsequent layers.
Allow each layer to dry sufficiently before printing over it. A thin layer may dry within minutes, but thicker layers or humid conditions require longer.
Do not assume that a print is fully dry simply because it feels dry on the surface.
D. Combining transparent and opaque layers
A useful sequence is:
- Print a light, transparent background.
- Add texture using a stencil or natural material.
- Allow the print to dry.
- Introduce a second transparent colour.
- Add a more opaque shape to establish emphasis.
- Finish with selected lines, marks or details.
This sequence creates a visual hierarchy in which the background supports the focal point.
Stencils, botanicals and texture transfers
The gel plate can capture an extraordinary range of shapes and textures. The key is to explore how each material interacts with the paint.
Stencils
Stencils can be bought or made from paper, card or thin plastic. Place them on the painted plate, then lift them before printing or leave them in position while pulling the impression.
The result depends on whether the stencil masks the paint, removes it or allows paint to collect around its edges.
Flowers and leaves
Use fresh leaves, ferns, grasses, petals and seed heads. Flat leaves with pronounced veins are particularly effective.
Place the botanical material on the painted plate and press gently. Remove it before printing to create a negative silhouette, or experiment with printing the paint-coated material separately.
Laser-printed images
Laser-printed images can be transferred to many commercial gel plates using suitable acrylic paint. Black-and-white images with strong contrast are often the easiest to work with.
- Roll a thin layer of acrylic paint onto the plate.
- Allow the paint to reach the appropriate tacky stage according to the technique and paint used.
- Place the laser print face down onto the paint.
- Burnish gently and evenly.
- Allow the paint to dry sufficiently.
- Peel the paper away carefully. Some paper may remain and need to be rubbed away gently with water, depending on the paint and plate.
Important: Use a laser print or photocopy rather than an ordinary inkjet print for this technique. Image transfer results vary with the paper, toner, paint and gel plate, so practise on small samples first. The transferred image will normally be reversed.
Scrunched-up paper
Scrunch paper into a loose ball, then flatten it slightly. Press it into the wet paint to create irregular lines and broken textures. Experiment with tissue paper, newspaper and heavier papers.
Other useful materials
- Bubble wrap for circular patterns.
- Mesh or netting for repeated linear marks.
- String for fine, winding lines.
- Corrugated card for parallel grooves.
- Fabric for woven textures.
- Masking tape for geometric divisions.
- Torn paper for irregular edges and organic shapes.
Always test unfamiliar materials before using them extensively. Avoid sharp objects that could damage the plate.
Gelli printing requires paint to spread into a thin, even film, remain workable long enough to make the print, and release cleanly onto the paper. Different formulations behave differently.
| Problem | Likely cause | Solution |
|---|---|---|
| Paint forms streaks or skips | Paint is too thick or does not spread evenly | Use less paint and roll it out thoroughly |
| Print looks pale or patchy | Low pigment concentration or insufficient coverage | Try a more opaque, strongly pigmented colour |
| Paint dries before printing | Very fast-drying formulation, thin layer or warm conditions | Work more quickly and prepare your paper beforehand |
| Paint smears under stencils | Layer is too wet or too thick | Apply a thinner layer and allow it to become tacky |
| Layers fail to adhere properly | Previous layer is too wet, too glossy or contaminated | Allow layers to dry appropriately and keep the plate clean |
10. How to care for your gelli plate
Proper care will help maintain the plate’s smooth surface and extend its useful life.
- Clean commercial plates with water and a soft cloth or according to the manufacturer’s instructions.
- Remove paint while it is still wet whenever possible.
- Avoid sharp tools, abrasive cleaners and excessive pressure.
- Do not cut directly on the plate.
- Keep the plate away from direct sunlight, excessive heat and sharp objects.
- Store it flat, clean and protected from dust.
- Follow the manufacturer’s storage instructions for commercial plates.
- Refrigerate homemade gelatine plates in a clean, airtight container.
- Never use a damaged or mouldy homemade plate without first assessing whether it is safe to retain; discard it if there are signs of deterioration.
If paint dries on a commercial plate, follow the manufacturer’s cleaning advice rather than using solvents or abrasive scrubbing.
Useful Tips
- Start with small amounts of paint. A thin film generally produces cleaner results than a thick layer.
- Keep a scrap sheet nearby for testing colours and checking the amount of paint on the plate.
- Work from lighter colours towards darker colours when you want to preserve delicate details.
- Use transparent colours to create depth and opaque colours to establish emphasis.
- Let layers dry before adding another when you want distinct, crisp shapes.
- Work quickly when using fast-drying acrylics, but do not sacrifice thoughtful composition.
- Try both positive and negative botanical impressions.
- Keep a record of successful colour combinations, paint consistency and transfer methods.
- Make several impressions from one plate rather than expecting every print to work perfectly the first time.
- Save unsuccessful prints. They can be cut up for collage, used as backgrounds or developed with drawing and painting.
- Avoid overworking a print. Sometimes the most effective decision is to stop while the image retains its freshness.
Application exercise: A layered botanical mixed-media print
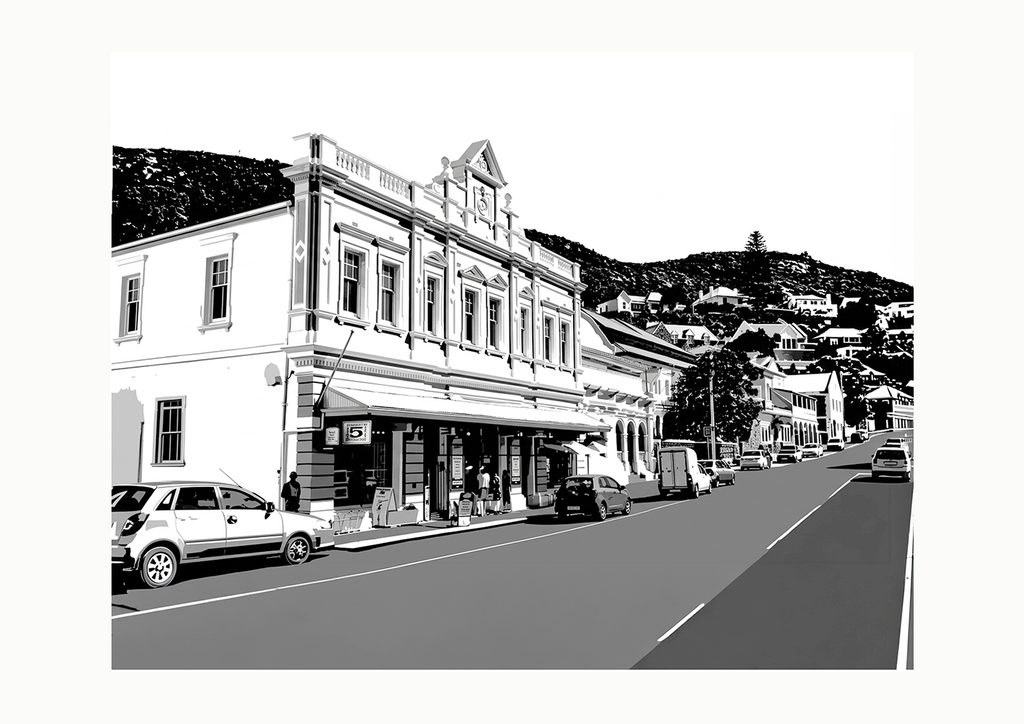
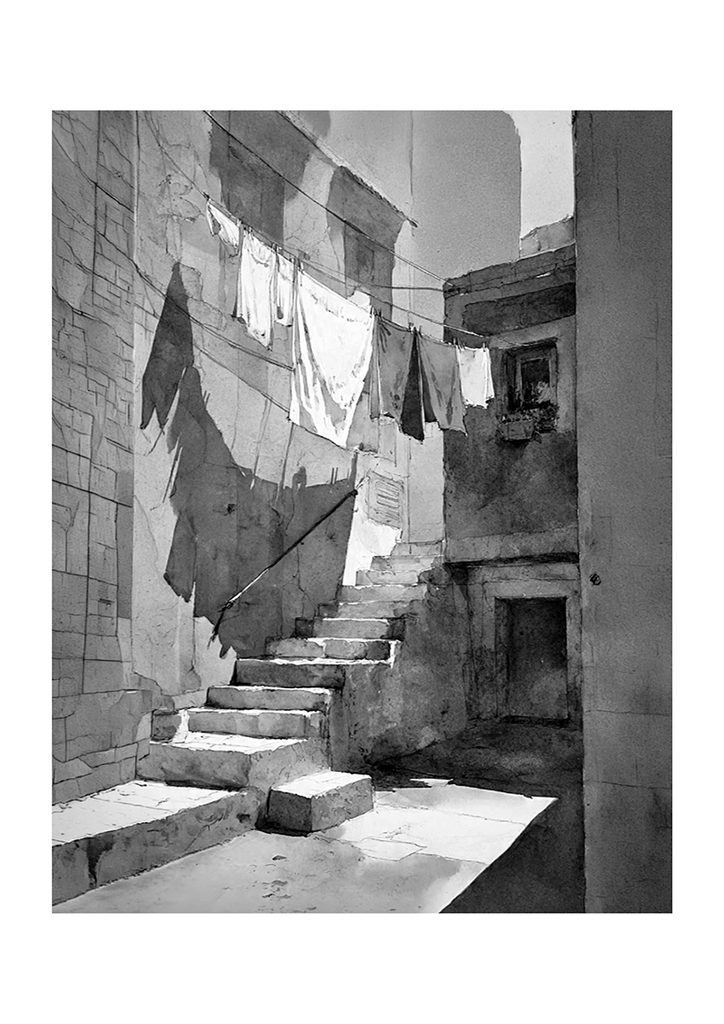
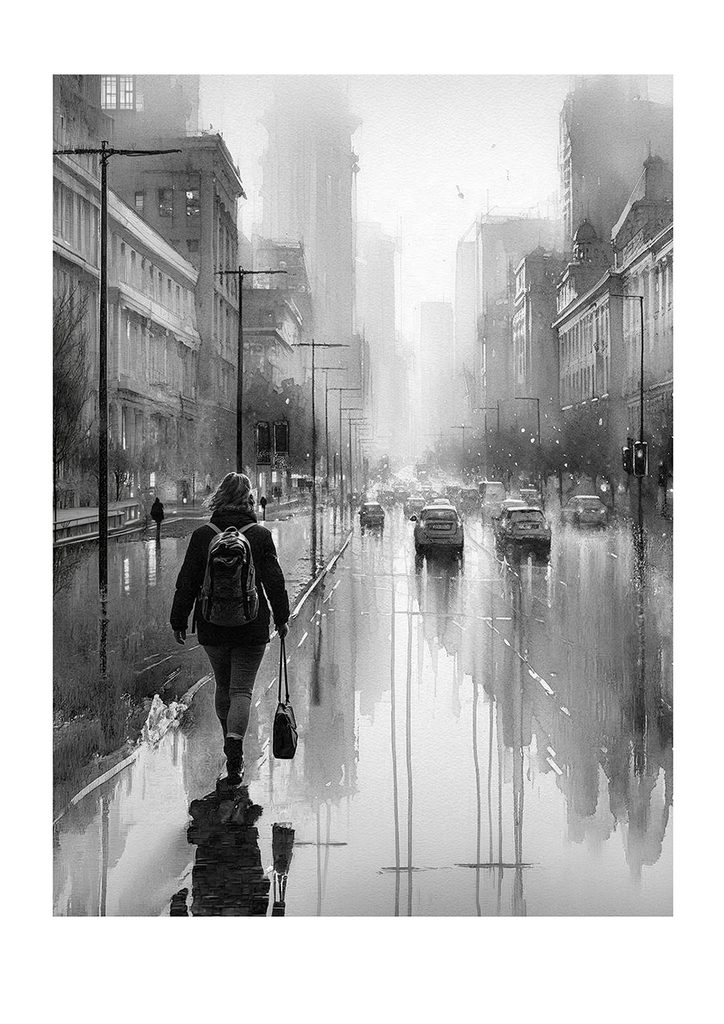
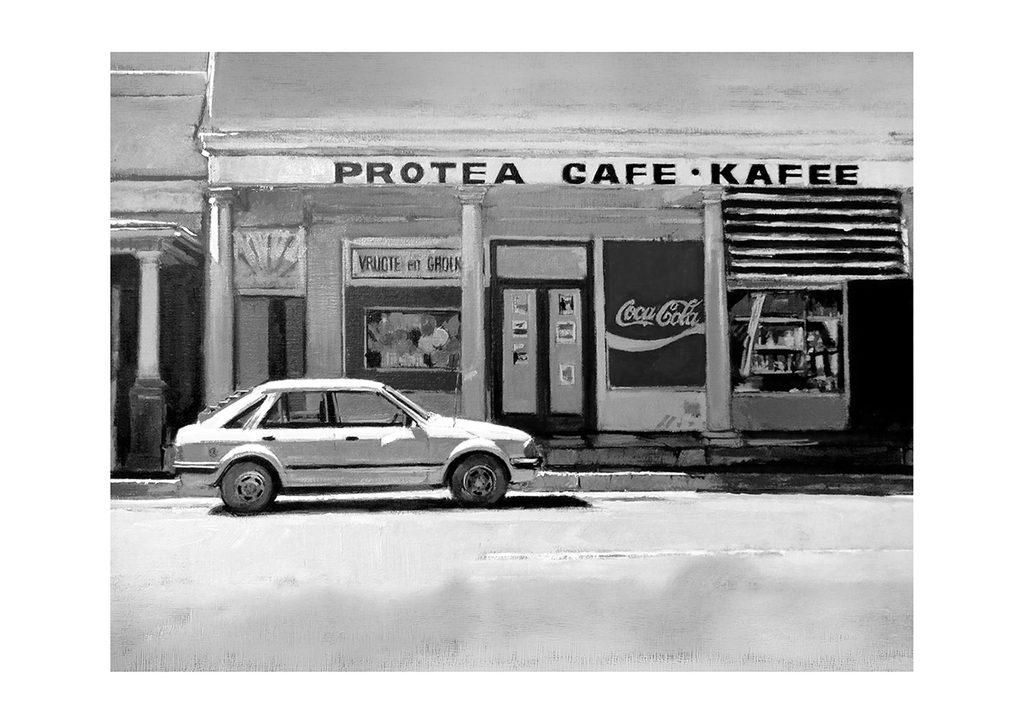
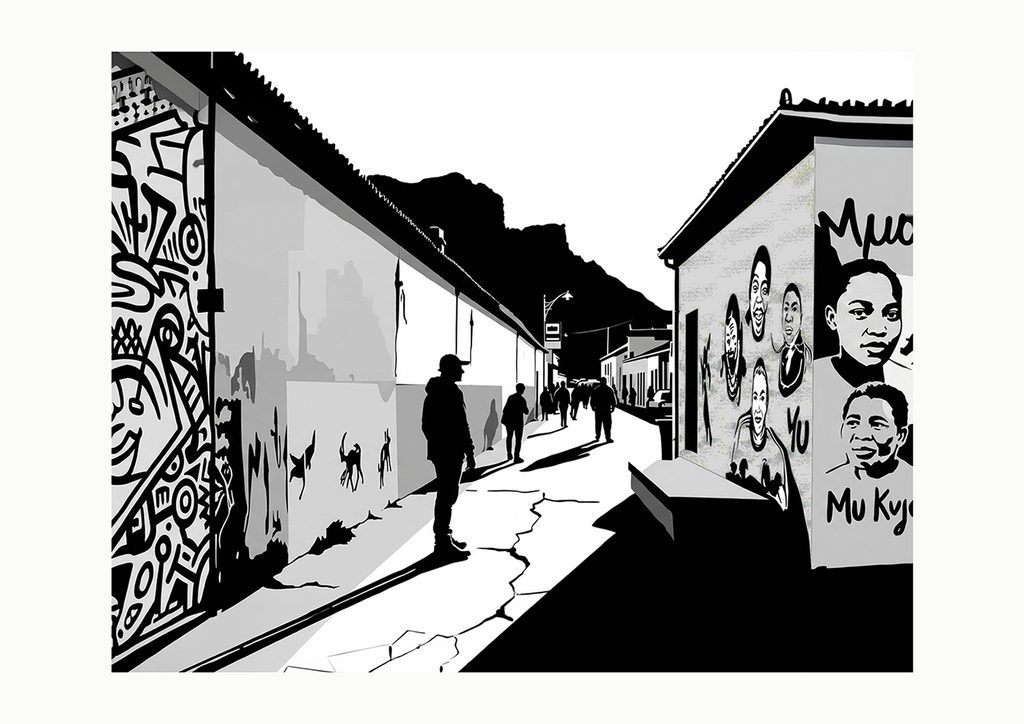
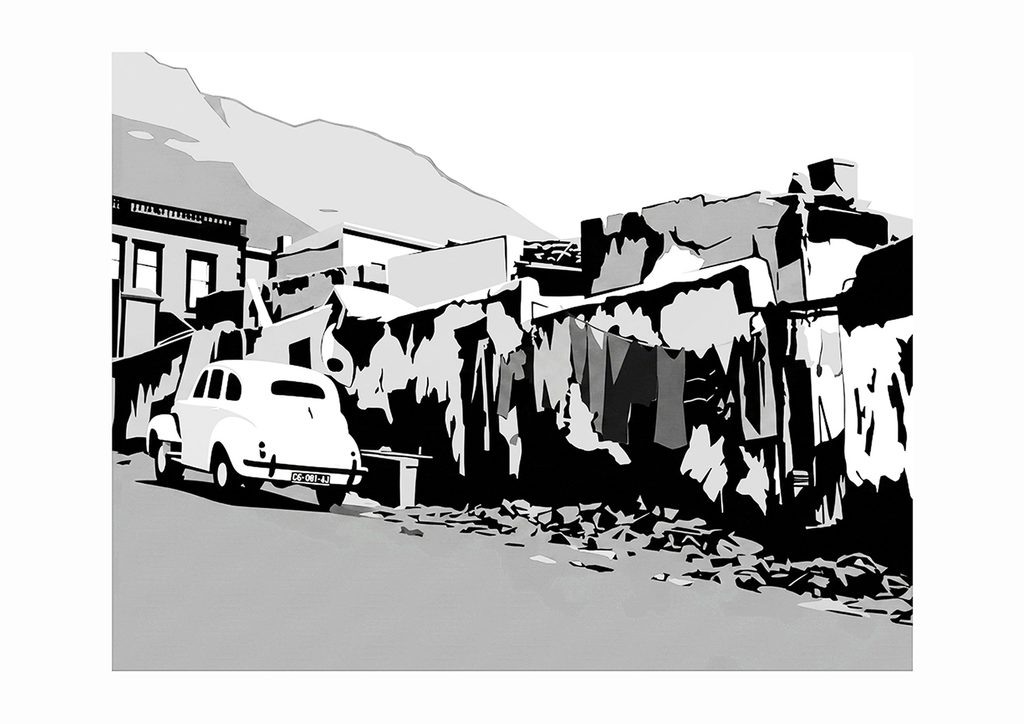
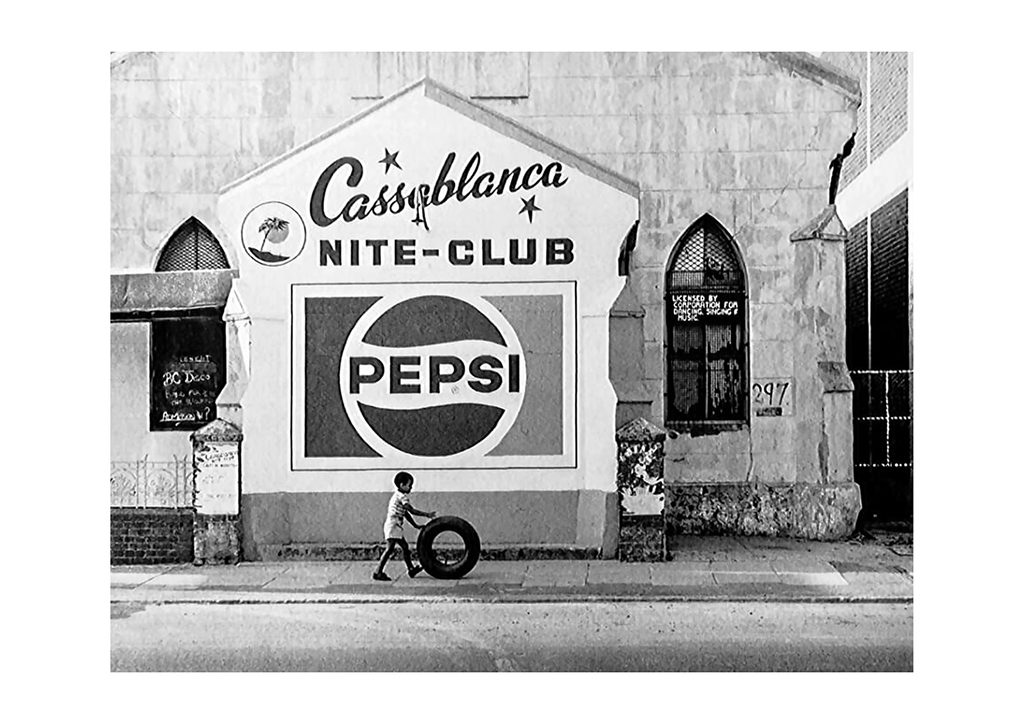
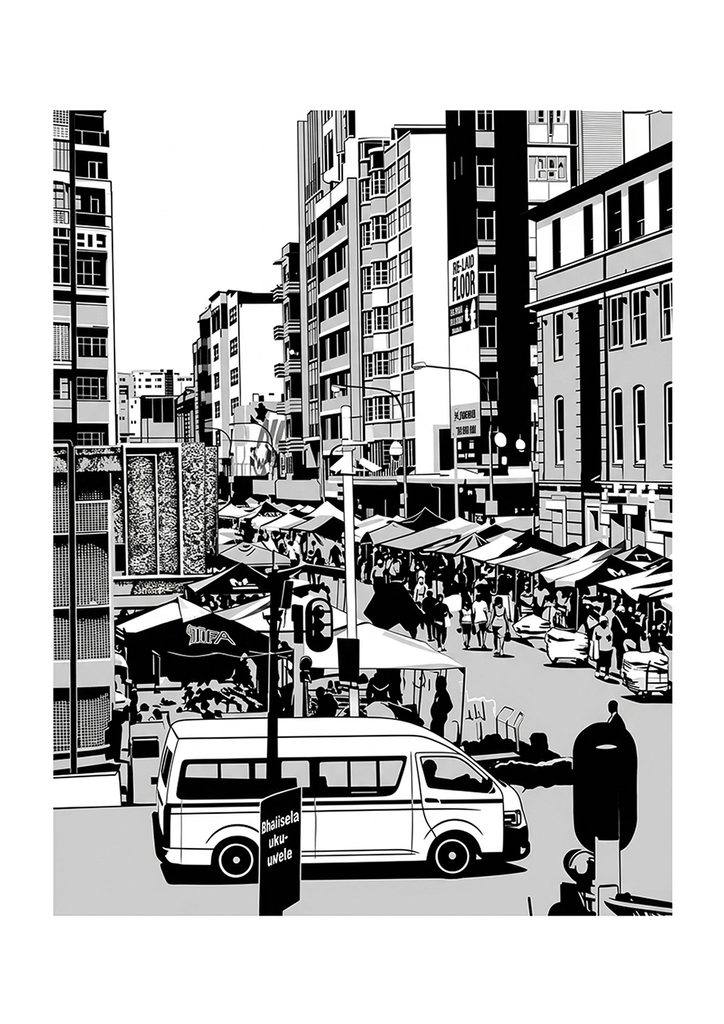
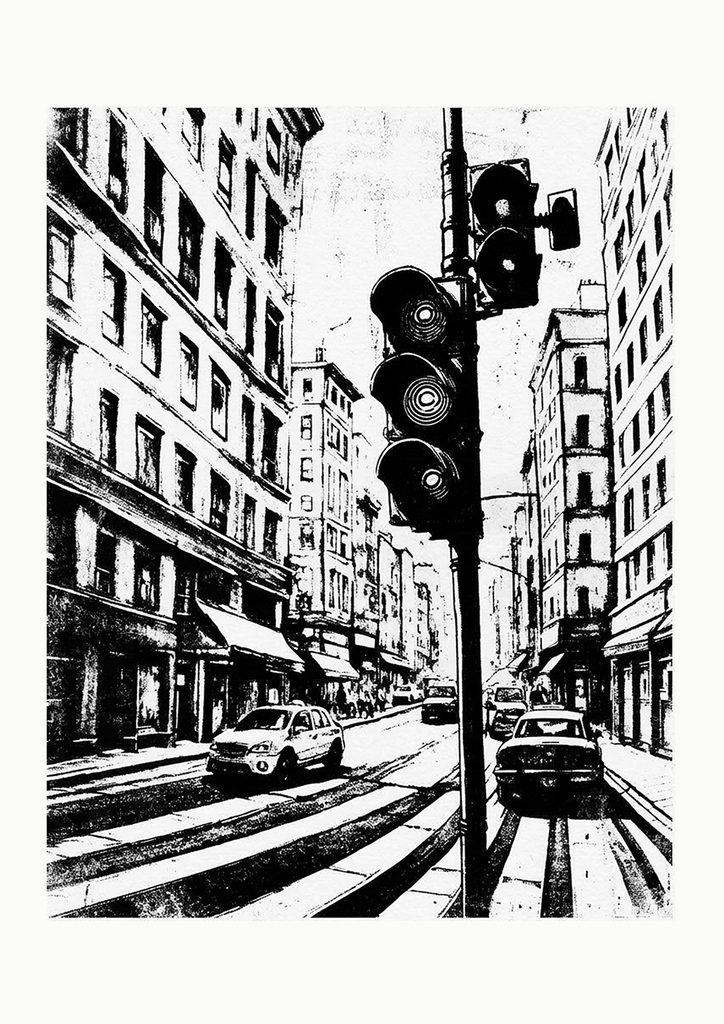
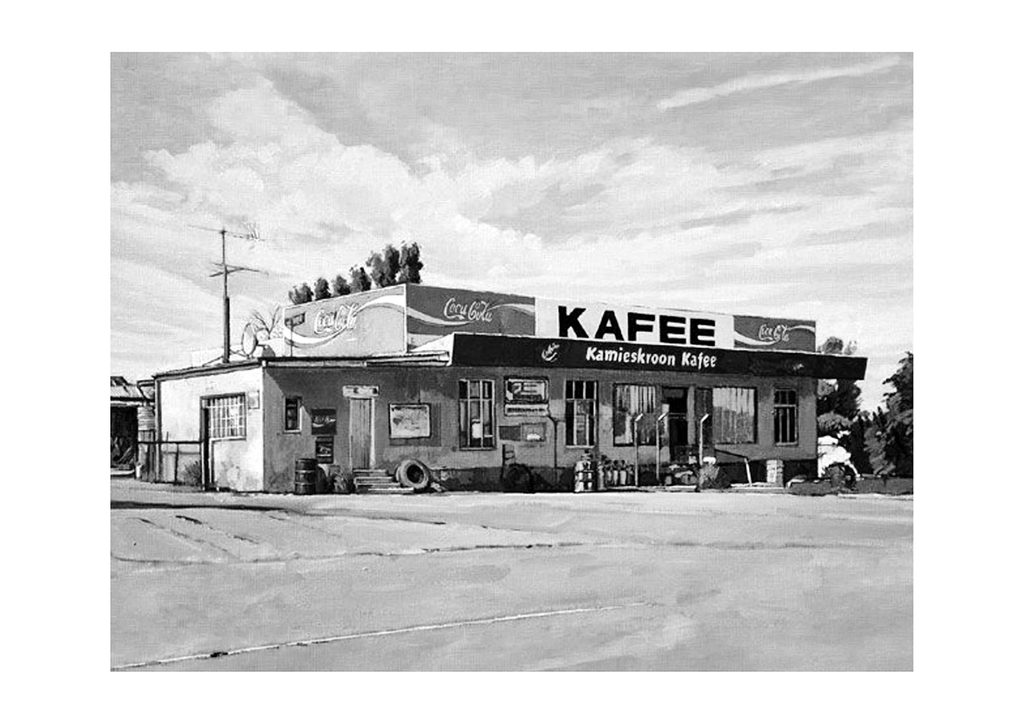
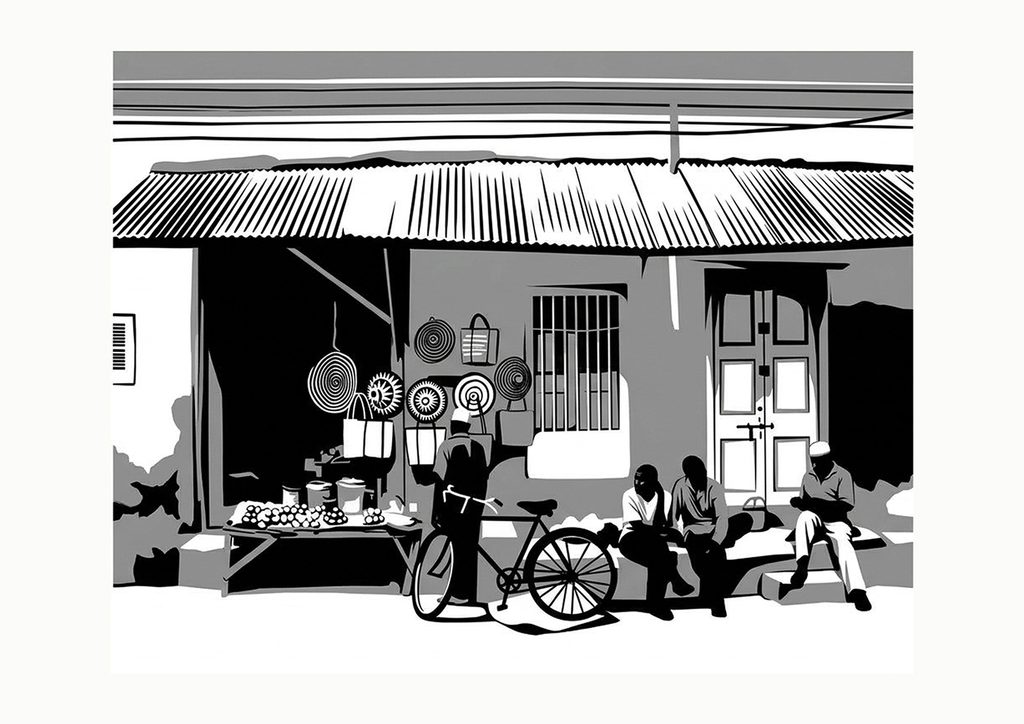
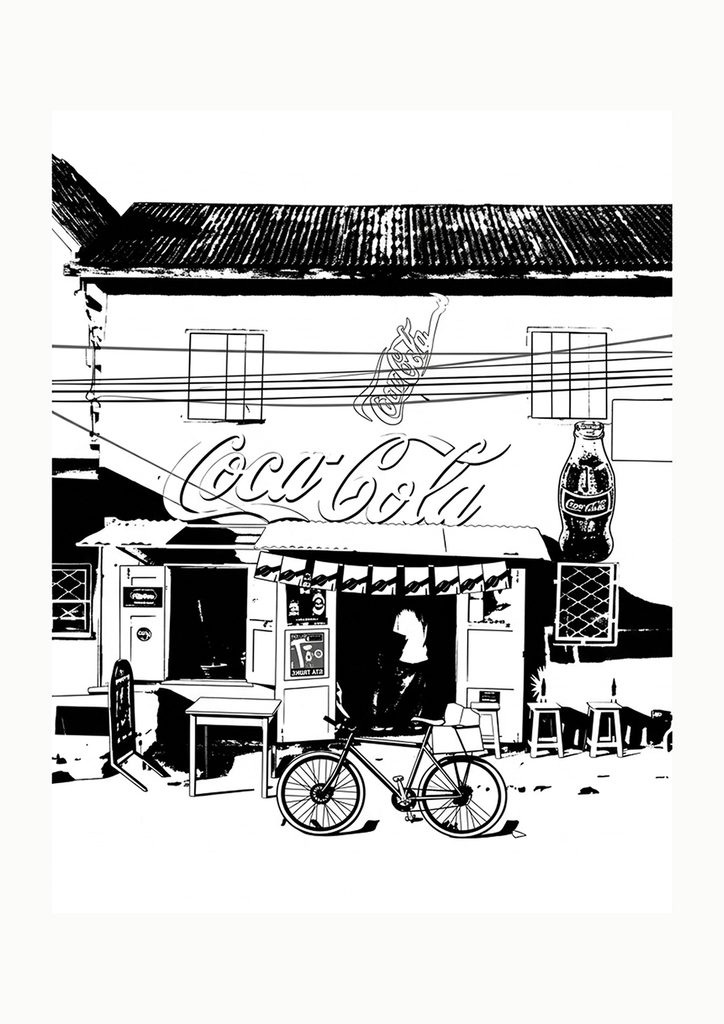
Choose from the street scene references – lazer-printed images provided and create a gelli plate print. Produce a small series of at least three prints, exploring different approaches to layering. Select one print for further development.
Stage 1: Background
Use two or three transparent colours to create an atmospheric background. Experiment with overlapping layers and subtle colour mixtures.
Stage 2: Texture
Introduce at least two different textural elements, such as leaves, flowers, scrunched paper, mesh or handmade stencils.
Stage 3: Emphasis
Create a clear focal point using contrast, scale, colour or an opaque shape. Ensure that the surrounding areas support the focal point rather than competing with it.
Stage 4: Image transfer
Experiment with a laser-printed image or a strong graphic silhouette. Consider how the transferred image interacts with the botanical textures.
Stage 5: Refinement
Once dry, add selected details using ink, pencil, charcoal, pastel or acrylic paint. Use these additions sparingly to strengthen the composition.
Assessment criteria
- Effective use of Emphasis.
- Interesting combinations of colour and texture.
- Evidence of controlled layering.
- Understanding of transparency and opacity.
- Thoughtful use of positive and negative shapes.
- Originality and willingness to experiment.
- A considered final composition.
Critique and reflection questions
Technical reflection
- Which paint consistency produced the clearest impression?
- How did drying time affect the quality of your layers?
- Which materials produced the most interesting textures?
- What differences did you observe between the first print and the ghost print?
- Which image-transfer technique worked best, and why?
Artistic reflection
- Where is the focal point of your strongest print?
- How did you establish emphasis through colour, contrast, scale or texture?
- Which transparent layers contributed most to the depth of the image?
- Did any opaque layers obscure important details? If so, how could you improve the result?
- How did the positive and negative shapes contribute to the composition?
- Did the unexpected marks improve the artwork or distract from its main idea?
- What would you change if you were to make the print again?
Conclusion
Gelli plate printing combines the spontaneity of experimental mark-making with the compositional decisions required to create a successful artwork. It encourages artists to explore colour, texture, positive and negative shapes, and the interaction between deliberate choices and unexpected results.
The most successful prints are not necessarily the most complicated. They are those in which the layers work together, the textures contribute to the image and a clear focal point gives the composition direction.
Continue experimenting with the prints produced during this lesson. Use them as the foundation for collage, drawing, painting or a more resolved mixed-media artwork. Above all, approach the process with curiosity: each impression offers another opportunity to discover something new.


Leave a Reply